Houdini - Ray and Blend Shape

We have two grids, we scatter an equal number of points on both. Boys on the left, girls on the right.
Blend Shapes is a lerp function. You give it a “start” and “goal” state – boys at the start, girls at the goal – and Houdini interpolates between them.
In the operator, blend1 is the bias – a float 0 <> 1 that sets the current “state” along that interpolation.
Messing around with it, we get a sort of lazyass “particle simulation” as the boys are interpolated to the girls. Notice, Houdini also interpolates @Cd – the blue changes to pink.
This works best when there’s an equal number of points in both “states” (it doesn’t have to be, we just get screwy behavior when they don’t).
Ray SOP
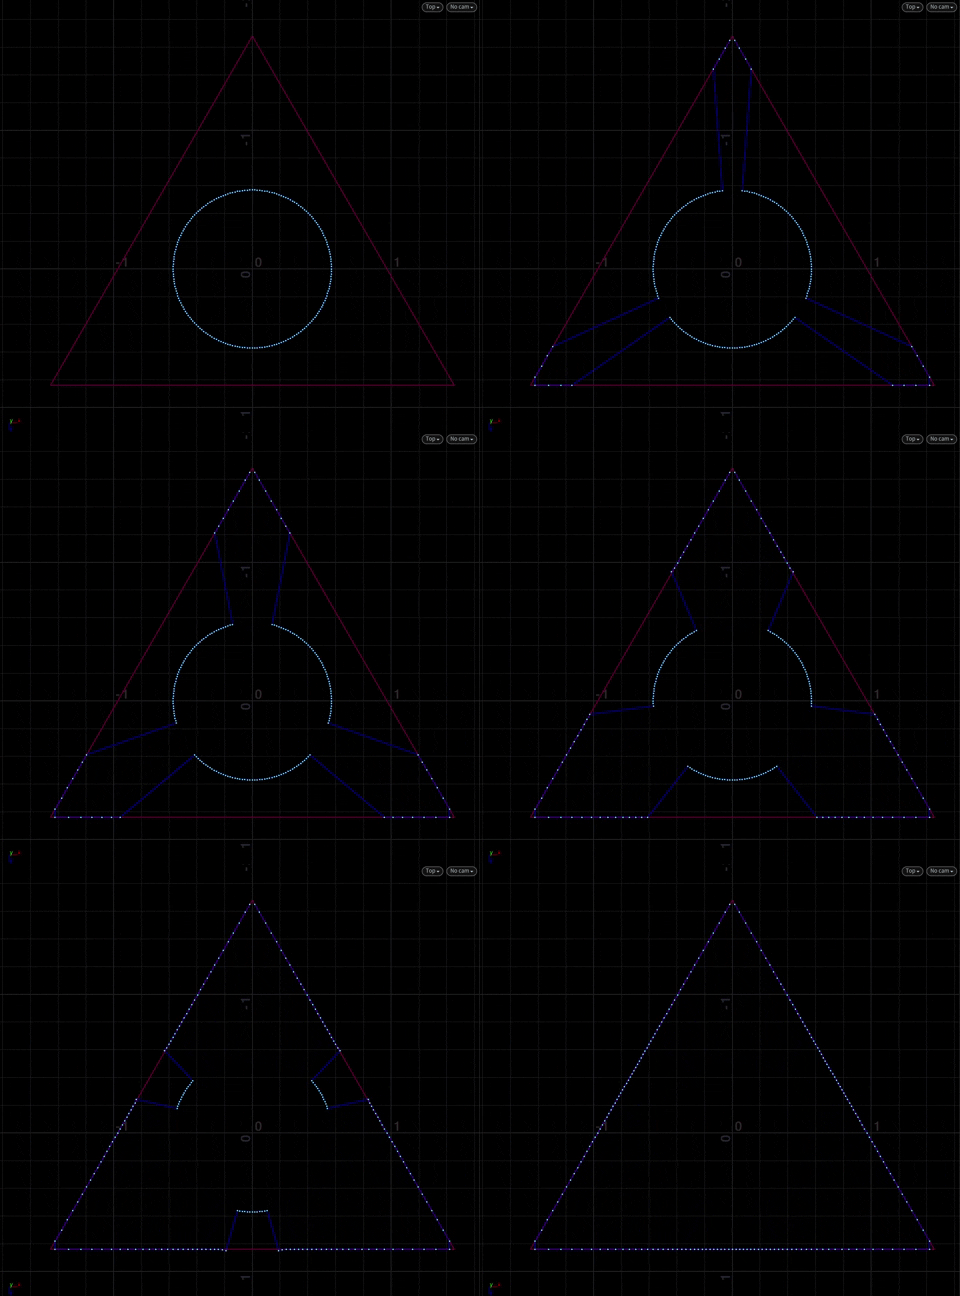
From a topview, we have a circle and a triangle.

[Above] The normals of the “circle points” (cyan) are directed out towards the triangle.

With a Ray SOP, the “circle points” are “shot out” along their normals until they hit the edges of the triangle. As bias goes to zero, more points are projected/shot out.
Finally, when bias is at zero, the cool thing is: every point from the circle now has a new spot on the triangle.
Which means we can use Blend Shapes to interpolate between the circle (the “start” state) and the triangle (the “goal” state).
Playing around with the blend1 parameter gives us this smooth “morphing” behavior between the shapes. Here’s the network:

Modeling with Ray and Blend
Every step along the blend is actual geometry, we get a shape that is a mix of both depending on how far along the blend we are.
Which means, we can combine these intermediete geos to make some kinda “morphing shape”.

Use a Copy Stamp and duplicate the shape on the points of a (vertical) line. The normalized @P.y of the line points will give us the “moving value” 0 <> 1 we need to feed into the blend1 parameter.
